|

If you need this page translated, highlight
and copy the url and paste it in the Translator
at the below link:  Choose the language you want
it translated to and click Go....
Webpage Translator
Drag the Arrow to mark your place
!

1. Open work area
500x500
2. Choose Preset Shapes - Rectangle
Antialias checked -
Line Width - 12
3. Draw a Rectangle
like shown below
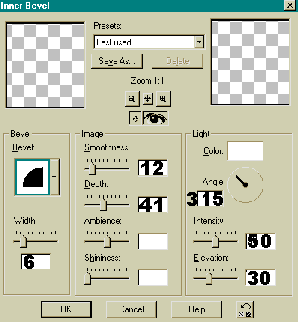
Fill it with a Wood Pattern and then go to Inner Bevel
using these settings !
4. Using your magic
wand, select the inside of the
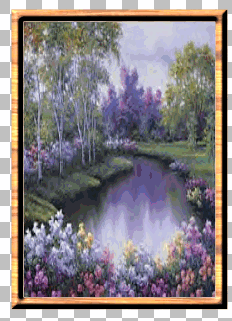
frame..Choose a picture of your choice to Insert into
Selection..You may also leave this area blank ! Your Choice !
5. Add a New Raster
Layer.
Using the Selection Tool/Rectangle, draw
a narrow rectangle from the top to the bottom in the center of
the window..Fill it with the Wood Pattern and
again take it to Inner Bevel using the same settings as
above.
6. Add a New Raster Layer and Draw another
rectangle horizontally and fill it again with the wood
pattern and use the same Inner Bevel settings.
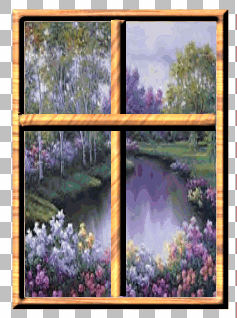
Your window should now look like this.
Go To Layers, Merge
Visible...
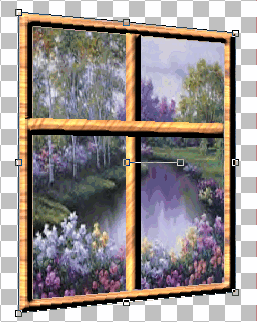
 7. Click on the deformation tool
  Hold down the Ctrl Key and click on the upper
right hand corner and drag it down slightly...
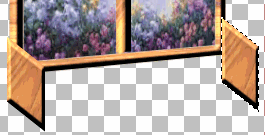
The window should now look like the one below.
Go to Layers, Merge Visible.
Hold down the Ctrl Key and click on the upper
right hand corner and drag it down slightly...
The window should now look like the one below.
Go to Layers, Merge Visible.
8. Add a New Raster
Layer
and draw a small rectangular shape like shown
below..

Use your deformation
Tool again and holding
down the Ctrl Key & Shift Key,,click on the right center
node and drag it downward...
It should now look like this..

Copy and Paste this
image to the right side of the
window and line it up so it looks like this..
10. Add a New Raster
Layer and using the Selection Tool/
Rectangle, draw a rectangle horizontally..This will be the
front of the window box..Fill it with the wood pattern fill and
again take it to Inner Bevel with the same settings..
10. Click on the Deformation Tool again
holding the
Ctrl Key & Shift Key down together,,drag the rectangle
at the right side center node to bring it up to fit
evenly in between the 2 side panels..
It should look something like this !
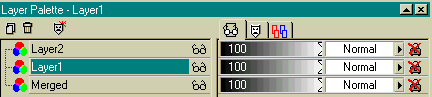
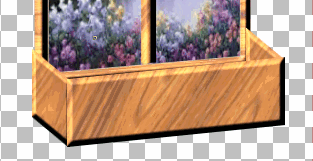 Go to the Layer
Palette
Go to the Layer
Palette
and activate Layer 1 by clicking on it to highlight it.
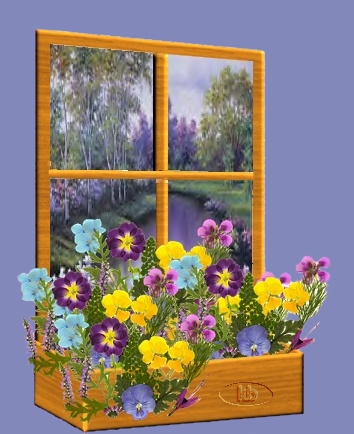
We are almost done,,We just need to add flowers
to the Flower Box..
Choose flowers you wish to use and just insert them
into the center of the box..They should slide in there
very easily...After you are done placing the flowers, if
some of the flowers or stems that you do not wish to show
are showing on the sides, just take your eraser tool while the
flowers
are still selected and erase those areas...
Merge all Layers Visible !
You now have a
Window Flower Box !
I hope you enjoyed
this tutorial as much as I did writing it,,
I love flowers
!
© 2000 *Kath's
Tuts & Graphic Designs*
Kath's Tutorial Korner
|