 If you need this page translated, highlight and copy
the text and then paste it to the text
translator at the Icon below !
If you need this page translated, highlight and copy
 the text and then paste it to the text
 translator at the Icon below !


You will need KPT5 for this tutorial and the
Cool Kitchen Preset.. I have included the
JPG images COOL KITCHEN
 Place both in the
KPT5/Goodies/Environment Maps
You will need KPT5 for this tutorial and the
Cool Kitchen Preset.. I have included the
JPG images COOL KITCHEN
Place both in the
KPT5/Goodies/Environment Maps
CoolKitchen.zip
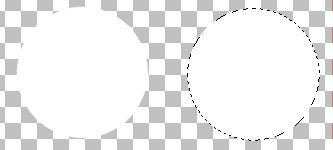
1. Open a Transparent
Image 400X400
2. Using your Selection Tool  , choose circle
from the Tool Options Box..
3. Make a circle and using the flood fill tool , choose circle
from the Tool Options Box..
3. Make a circle and using the flood fill tool  fill the lens with white.. I made my circle
the size below..You can make the lens
as large or small as you like.. The shape can
also be changed,,I used a circle just to illustrate
this tutorial !
fill the lens with white.. I made my circle
the size below..You can make the lens
as large or small as you like.. The shape can
also be changed,,I used a circle just to illustrate
this tutorial !

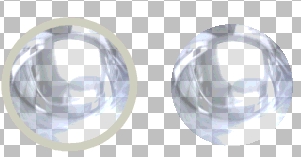
4. Now go the Edit, Copy and then Paste
 as New Selection to make the other circle..
 Line up the new selection evenly next to
the original lens leaving some space in between...
5. Now hold down your shift key and using
your Magic Wand,  select the circle on the
left clicking in the center of it.. Now both circles
should have marching ants around them.
6. Go to KPT5 and select Shapeshifter.
Go to the Environment Box select the circle on the
left clicking in the center of it.. Now both circles
should have marching ants around them.
6. Go to KPT5 and select Shapeshifter.
Go to the Environment Box
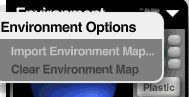 Click on the arrow pointing down and
choose Import Environment Map...If u have
not used KPT5 before, then you will need
to locate your KPT5 Folder and find
the Cool Kitchen preset...Mine is in
a folder called Goodies and then the sub
folder EnvMaps.. Click on either of the
Cool Kitchen presets and it will return
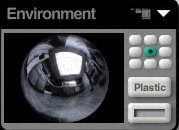
you to the previous screen..Now you
should see your box with this in it
***Left click under the word Plastic...
This will bring up a color chart,,
You can choose the color you wish now ..
I chose a gray color..***
Click on the arrow pointing down and
choose Import Environment Map...If u have
not used KPT5 before, then you will need
to locate your KPT5 Folder and find
the Cool Kitchen preset...Mine is in
a folder called Goodies and then the sub
folder EnvMaps.. Click on either of the
Cool Kitchen presets and it will return
you to the previous screen..Now you
should see your box with this in it
***Left click under the word Plastic...
This will bring up a color chart,,
You can choose the color you wish now ..
I chose a gray color..***
7. Click on the Main Shape Box
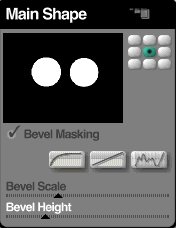
By dragging the slider bar on the Bevel Scale
and Bevel Height, you change the appearance
 of the circles...
The
settings I chose are above.. Once you get the circles to look the
way you like, click
on the check mark in the lower right hand corner and it will bring you back
to PSP.. Your
circles should now look like this...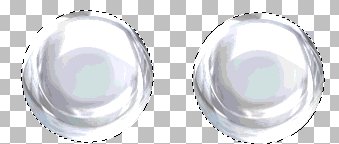
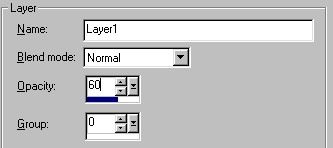
8. Now go to Layers, then Properties...
We are just changing the Opacity here from
100 to 60...Click OK and you will see that
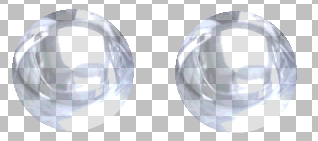
your circles become transparent..
Picture
of circles after changing opacity below...
Go
to Selections,, Select None
 9. Go to Layers then New
Raster Layer, then
Click OK.
10. Using the Preset Shapes
Tool,
9. Go to Layers then New
Raster Layer, then
Click OK.
10. Using the Preset Shapes
Tool,  choose Circle and use these settings.. choose Circle and use these settings..
Shape Type - Circle
Line Width - 8
Style - Stroked
Antialias - Checked
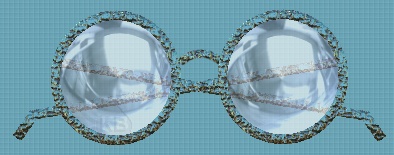
Starting at the center of your circle,
create another circle around it so that it
fits around it to make a rim for the lens as
illustrated here..
 Then
I took it to Bladepro and used the lizard preset..*You can use whatever preset
you like*...or use another filter of your choice such as Eye Candy,
etc.
Then
I took it to Bladepro and used the lizard preset..*You can use whatever preset
you like*...or use another filter of your choice such as Eye Candy,
etc.
Now go to Edit, Copy and then paste as New
Selection over the rim of the other lens...
Now it will look like this.... Go to Selections,
Select None.. Go to Layers and Merge Visible

11. Go to the Draw Tool
and in the Tool Options Box
Choose these settings...
Shape Type - Bezier
Line Width - 8
Antialias - Checked
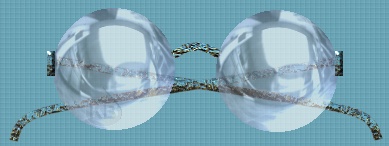
Draw a straight line in the center of the 2 circles
with the Bezier Line Tool and then move the cursor
just a little itty bit to the left of the center and
drag it upwards pulling from the center to arch
it and then drag it again pulling from the center
again but this time going a little itty bit
to the right
and you will then see that you have curved it...

It will now look like this  Using the Magic Wand, select it and bring
it to Bladepro again *or whatever you may
have used on it* to apply your filter...
We're getting there :-)
12. Create a new Raster Layer...
We are now going to make the Wires so
the glasses can hang over your ears,,,LOL
Choose the Draw Tool
Using the Magic Wand, select it and bring
it to Bladepro again *or whatever you may
have used on it* to apply your filter...
We're getting there :-)
12. Create a new Raster Layer...
We are now going to make the Wires so
the glasses can hang over your ears,,,LOL
Choose the Draw Tool  Type - Single Line
Style - Line Tool
Width - 8
Antialias - Checked
Draw a line at about a 75 degree angle like below...
Now we need to make the little curved thingy
at the end to hang over the ears,
so using the Draw Tool again with the
same settings as before draw a short
line from the left bottom edge of the
original line at a slight angle...
You can also use the Bezier Tool and just
curve the end...
Type - Single Line
Style - Line Tool
Width - 8
Antialias - Checked
Draw a line at about a 75 degree angle like below...
Now we need to make the little curved thingy
at the end to hang over the ears,
so using the Draw Tool again with the
same settings as before draw a short
line from the left bottom edge of the
original line at a slight angle...
You can also use the Bezier Tool and just
curve the end...
Select this wire with your Magic Wand
 and again bring it to Bladepro
 or whatever you used for a filter..
Go to Edit, Copy and Paste it as a New
Selection and then go to Image and
then Mirror....Now make sure your Mover
Tool is Selected  and move this new wire
over the other one to criss-cross it...
At this point, you can hide your wire layers and merge
the other layers visible...Then hide the merged
layer and merge the 2 wires vivisble...
Then on the layer palette, just drag the wires
under the eyeglasses layer.. and move this new wire
over the other one to criss-cross it...
At this point, you can hide your wire layers and merge
the other layers visible...Then hide the merged
layer and merge the 2 wires vivisble...
Then on the layer palette, just drag the wires
under the eyeglasses layer..
 Voila !
You have a pair of eyeglasses ! :-)
Save it as a JPG or a Tube !
I hope you enjoyed this tutorial as
much as I did creating it !
Below are eyeglasses saved as a
Tube in PSP format.  I made these without
rims...
 It shows the transparency more when
 saved as a tube and applied to a colored background..
It is also a smart thing to save your creations
as Tubes so you can use them again in the future !
 Tutorial Index
©
2000 *Kath's Tuts & Graphic Designs*
Tutorial Index
©
2000 *Kath's Tuts & Graphic Designs* |