 If you need this
page translated, highlight and copy
If you need this
page translated, highlight and copy
the text and then paste it to the text translator
at the Icon below !
 If
you want to use the bird tube that I have
used
in this Tutorial,,click here to download
Bluebird
Tube.zip
1
Open up a New Image 500X500
Transparent... This
will give you plenty of workspace..
You
can Crop it at the end...
2.
Choose a Foreground & Background
Color
of your Choice...I chose black as my
backgrond
and a shade of brown for my Foreground..
3.
Select Your Preset Shapes Tool
If
you want to use the bird tube that I have
used
in this Tutorial,,click here to download
Bluebird
Tube.zip
1
Open up a New Image 500X500
Transparent... This
will give you plenty of workspace..
You
can Crop it at the end...
2.
Choose a Foreground & Background
Color
of your Choice...I chose black as my
backgrond
and a shade of brown for my Foreground..
3.
Select Your Preset Shapes Tool 
Shape Type: Ellipse
 Line Width: 4
Style: Stroked & Filled Antialias Checked
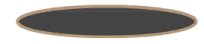
4.
Draw an Ellipse as shown below
 5.
Now Go To Your Draw Tool (*the little pencil*)
5.
Now Go To Your Draw Tool (*the little pencil*) and
use these settings Type: Single
Line Style: Stroked Width:
4 Antialias Checked Draw
Lines like displayed below...
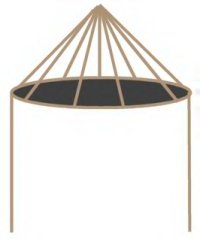
Start
at the center line at the top and draw your angled lines from
that point... Draw one line
to the front of the ellipse and
one line to the back of the ellipse...
This
will give the Top of the Cage some dimension..Two (2) Pictures
shown below..... and
use these settings Type: Single
Line Style: Stroked Width:
4 Antialias Checked Draw
Lines like displayed below...
Start
at the center line at the top and draw your angled lines from
that point... Draw one line
to the front of the ellipse and
one line to the back of the ellipse...
This
will give the Top of the Cage some dimension..Two (2) Pictures
shown below.....


6.
Now still using the Draw Tool ,,draw vertical
lines down both sides of the top of the cage.
 Type: Single Line
 Style: Stroked
Width: 4 Antialias Checked
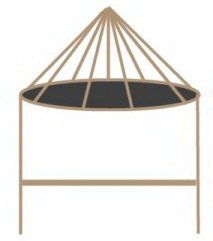
 7.
Now we are going to draw the Perch Use
the Draw Tool
7.
Now we are going to draw the Perch Use
the Draw Tool
Type: Single Line
Style: Stroked
 Width: 8 Antialias Checked
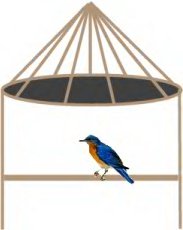
8.
Now go to Your Tubes and Choose
the
Bluebird that is attached or a bird
of
your choice... I usally open
a new work area and place the tube on
it then I copy and paste as a New Selection
so I can move it around and get it
where I want it....
 9.
Using the Preset Shapes..
9.
Using the Preset Shapes..
Shape Type: Ellipse Line
Width: 4
Style: Stroked & Filled Antialias Checked
Draw
an Ellipse starting from center to the
lines
at each side..
 10.
Now Draw Vertical lines connecting one to the front
of the Base and one to the rear,,,This will
also
give the cage some dimension...
Illustrated
below:
10.
Now Draw Vertical lines connecting one to the front
of the Base and one to the rear,,,This will
also
give the cage some dimension...
Illustrated
below:
 11.
You can also give this an Inner Bevel look
Using
your Magic Wand,, just click
on the cage..and then bring it to
Image, Effects, Inner Bevel...
Selections,
Select None It will now
look like this..
11.
You can also give this an Inner Bevel look
Using
your Magic Wand,, just click
on the cage..and then bring it to
Image, Effects, Inner Bevel...
Selections,
Select None It will now
look like this..
 12.
To finish,,we need to make a Ring at the top of the Cage.. Use
your Shapes Tools and use these
settings:
12.
To finish,,we need to make a Ring at the top of the Cage.. Use
your Shapes Tools and use these
settings:
Shape Type: Circle
Line Width: 4
Style: Stroked & Filled Antialias Checked
I
used the Stroked & Filled so I could take out
the very top of the cage which gets a little lumpy
after inner bevel..lol After drawing
the circle,,use your Magic Wand and
click
in the center of the Circle and then go to Edit and Clear or
use your Delete Key on the keyboard..
Then
choose Selections,,Select None
To
finish,,,Use the Magic Wand and click on the Circular Ring..... and
bring it to Image, Effects, Inner Bevel,
Selections,
Select None... Again using
the Magic Wand,,Click anywhere in the white
area
of your workspace,,Now go to Selections,
Invert,,then
go to Image, Crop To Selection..
Voila
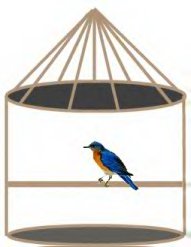
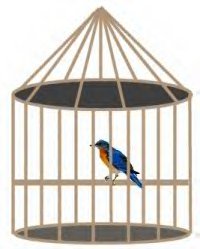
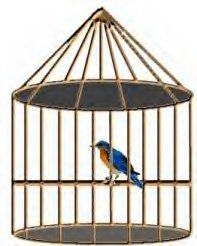
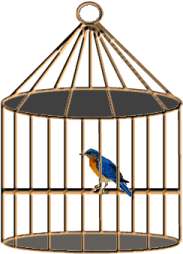
!!!! You have a birdcage...
:-)
You
can decorate the Birdcage anyway you like.
 Choose another Tutorial Below
Tutorial Index
©
2000 *Kath's Tuts & Graphic Designs*
Choose another Tutorial Below
Tutorial Index
©
2000 *Kath's Tuts & Graphic Designs*
|